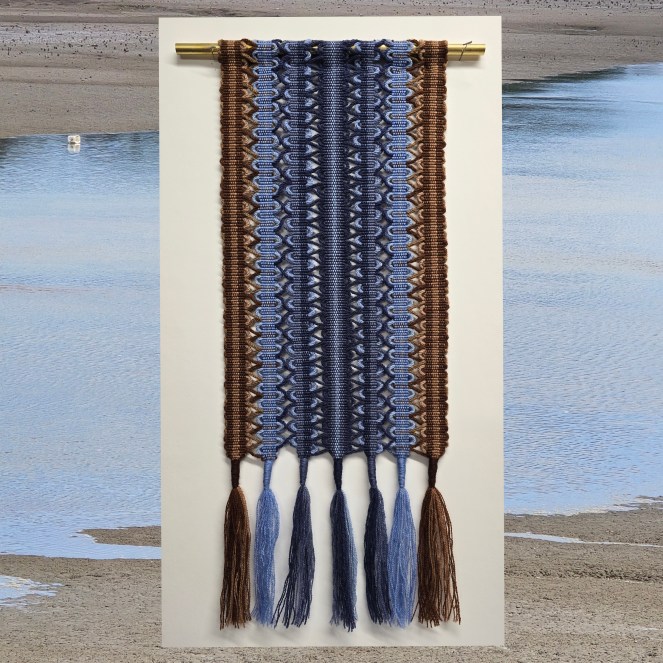
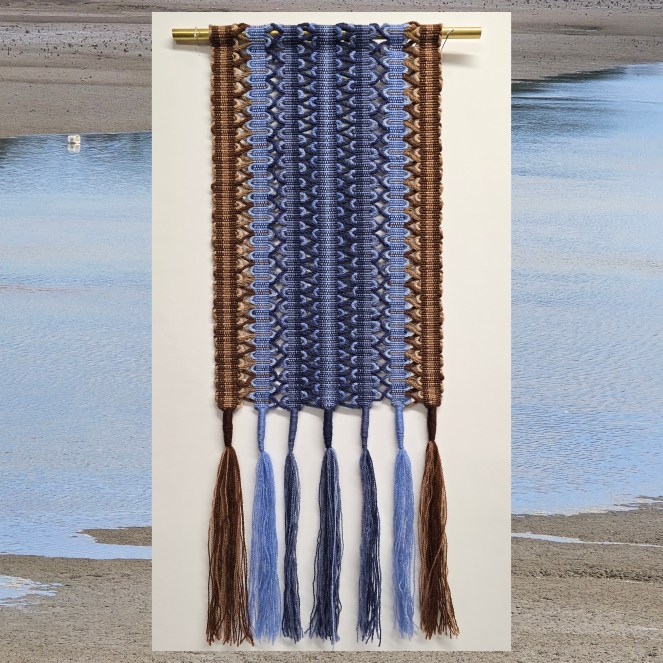
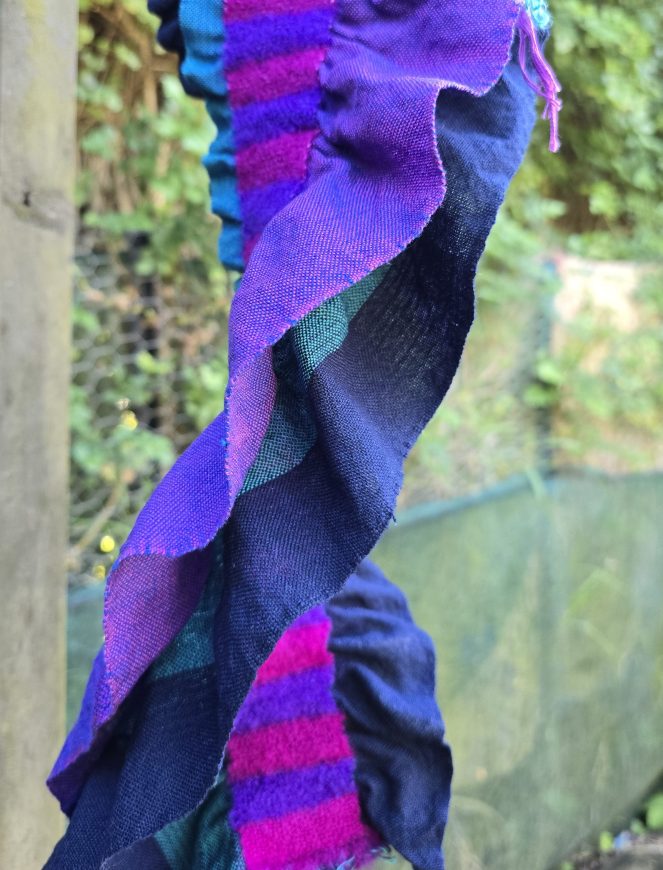
Rivers – Metaphor for a Journey is an exhibition by the Professional Weavers Network of New Zealand The show is on at the Aigantighe Art Gallery in Timaru until 22 March and then it’s coming up to the Franklin Arts Centre in Pukekohe. My two works in this exhibition were inspired by the Waiuku River, more commonly known as the Waiuku Estuary. The appearance of this tidal river changes over the day as the mudflats are revealed and then concealed by the movement of the water.
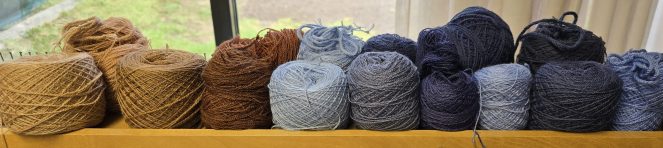
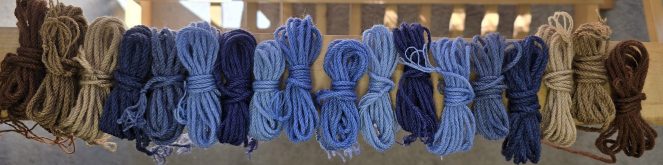
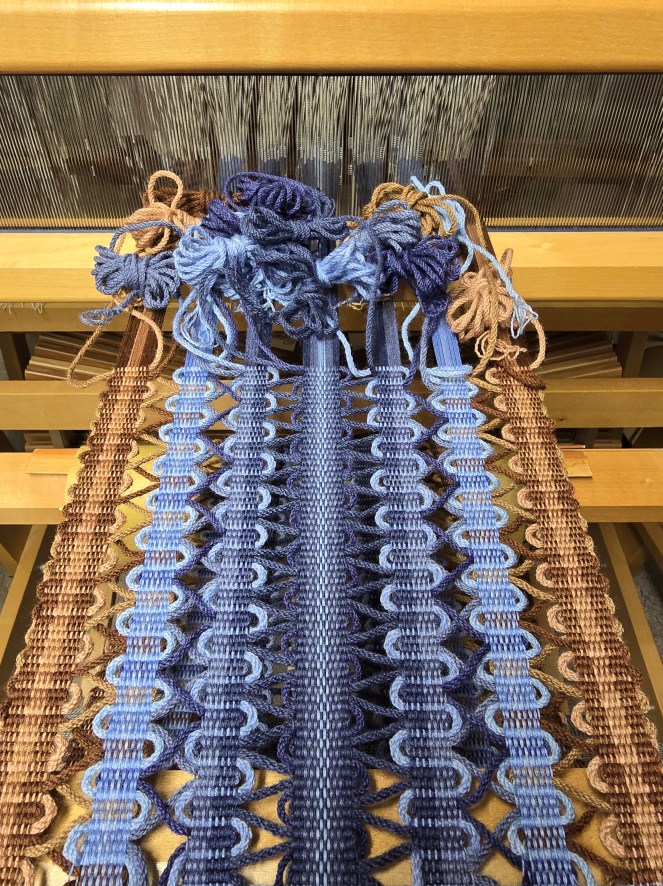
I used passementerie techniques to create my works, starting with creating twisted cords from hand-dyed corriedale wool. The browns were dyed using harakeke seedpods harvested from my garden and the blues are acid dyes.
You can see a glimpse of the river in the background of the pictures of the finished works.
I’ve been weaving, more tea towels. I really like the variations possible on one warp with the Bumberet weave structure, though I have tended to only use three treadling variations for the tea towels.
At the end of each warp I have played with other treadlings and weft colours, and I’ve made some of that fabric up into Christmas tree decorations. I also made the hanging cords from thrums from the warps.
That’s enough tea towels for a while, I’m planning some new projects. I may return to Bumberet as I also wove a sample warp with wool and it produced a few samples that I want to investigate further.
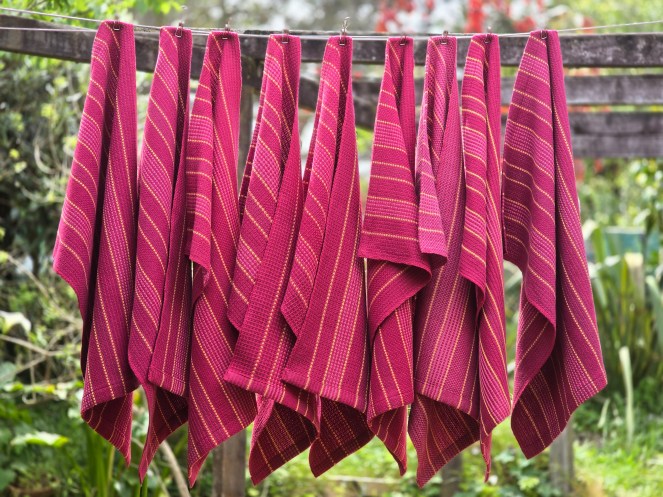
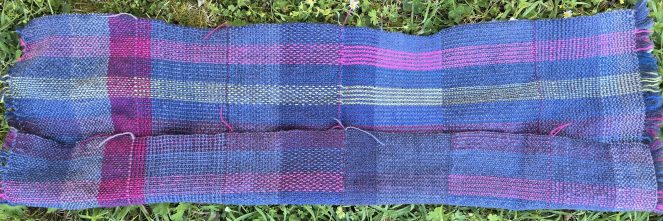
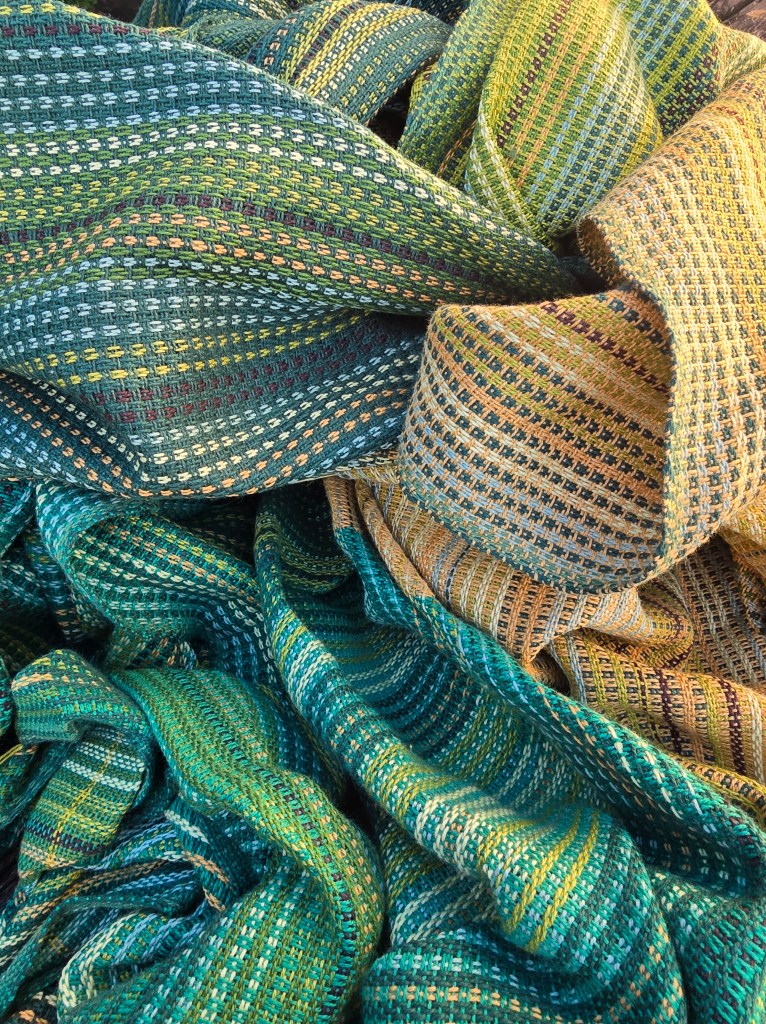
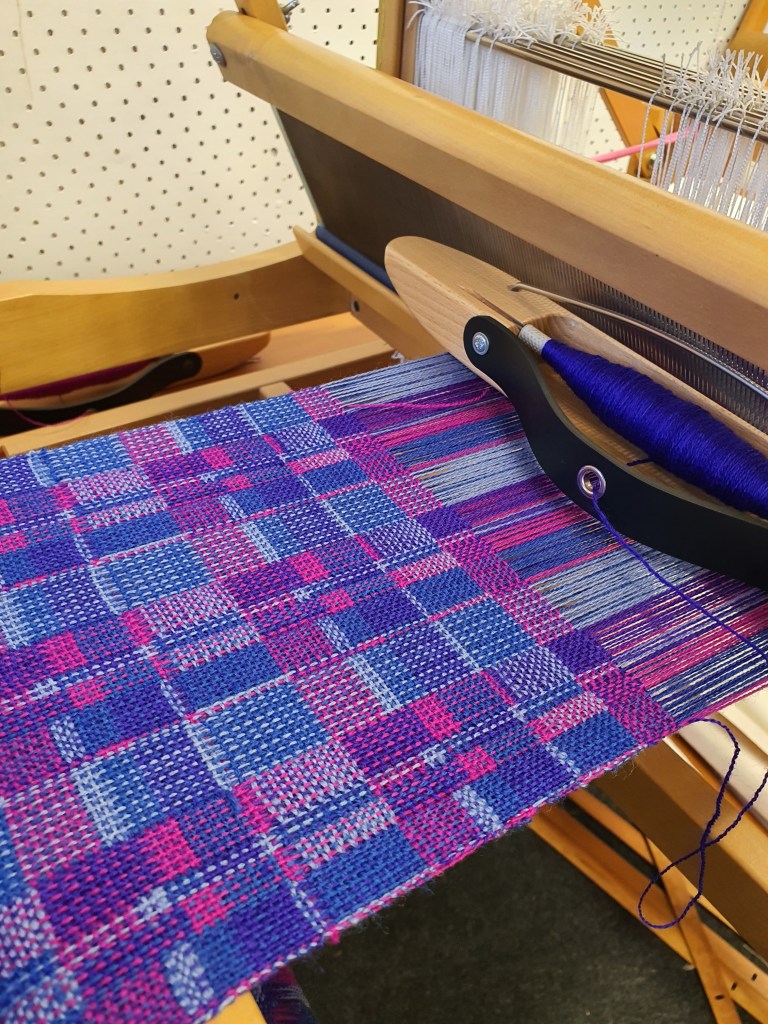
I decided to use up some cones of 8/2 cotton, predominantly shades of green, and weave some tea towels using bumberet weave. I didn’t bother to work out a colour sequence before winding the warp other than winding groups of three to work with the threading. However I was forced to ignore this plan and change colours part way through a group of three in a few places when I ran out of a colour. I was a bit worried when weaving the towels that this was a bad mistake and I should have planned the colours a bit better but once the towels were all finished I’m quite happy with the results.
On the loom
Off the loom, before wet finishing
Threading: point twill on 4 shafts Warp sett: 22 epi
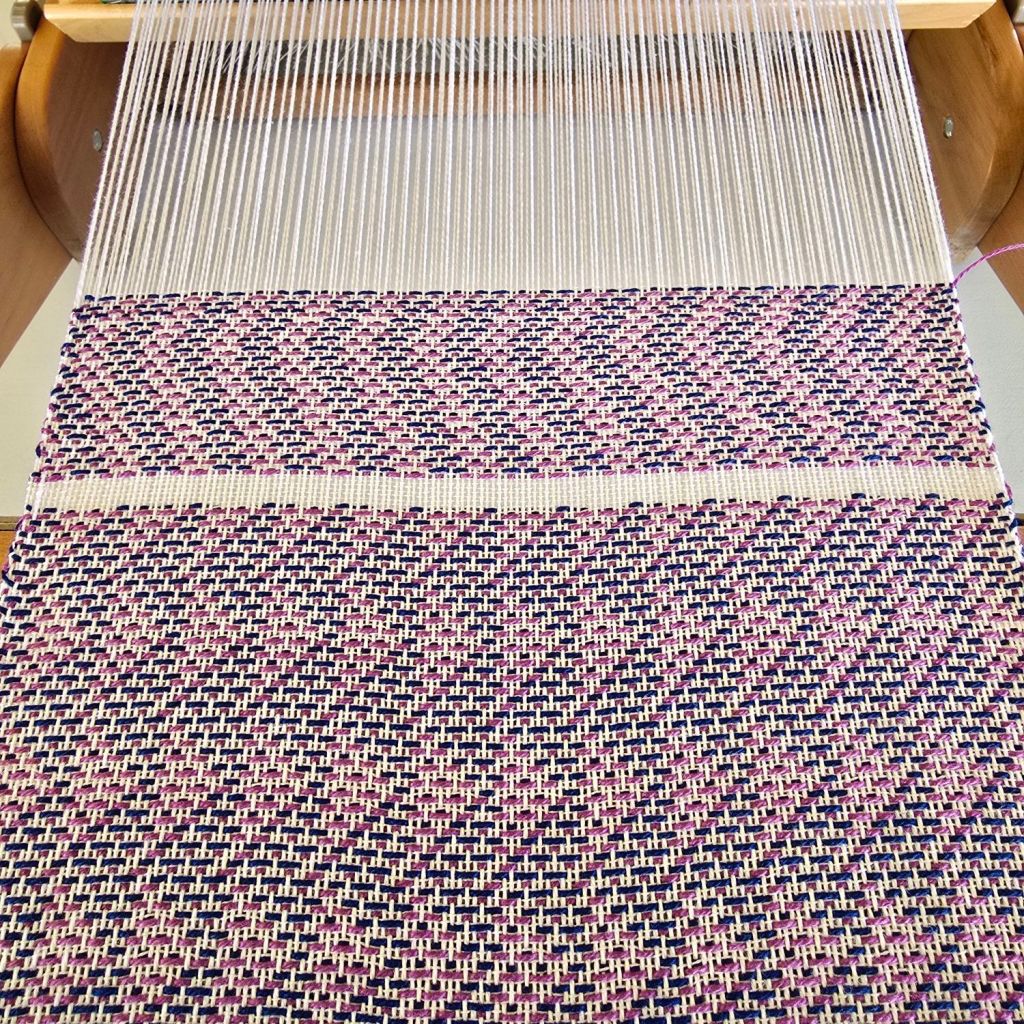
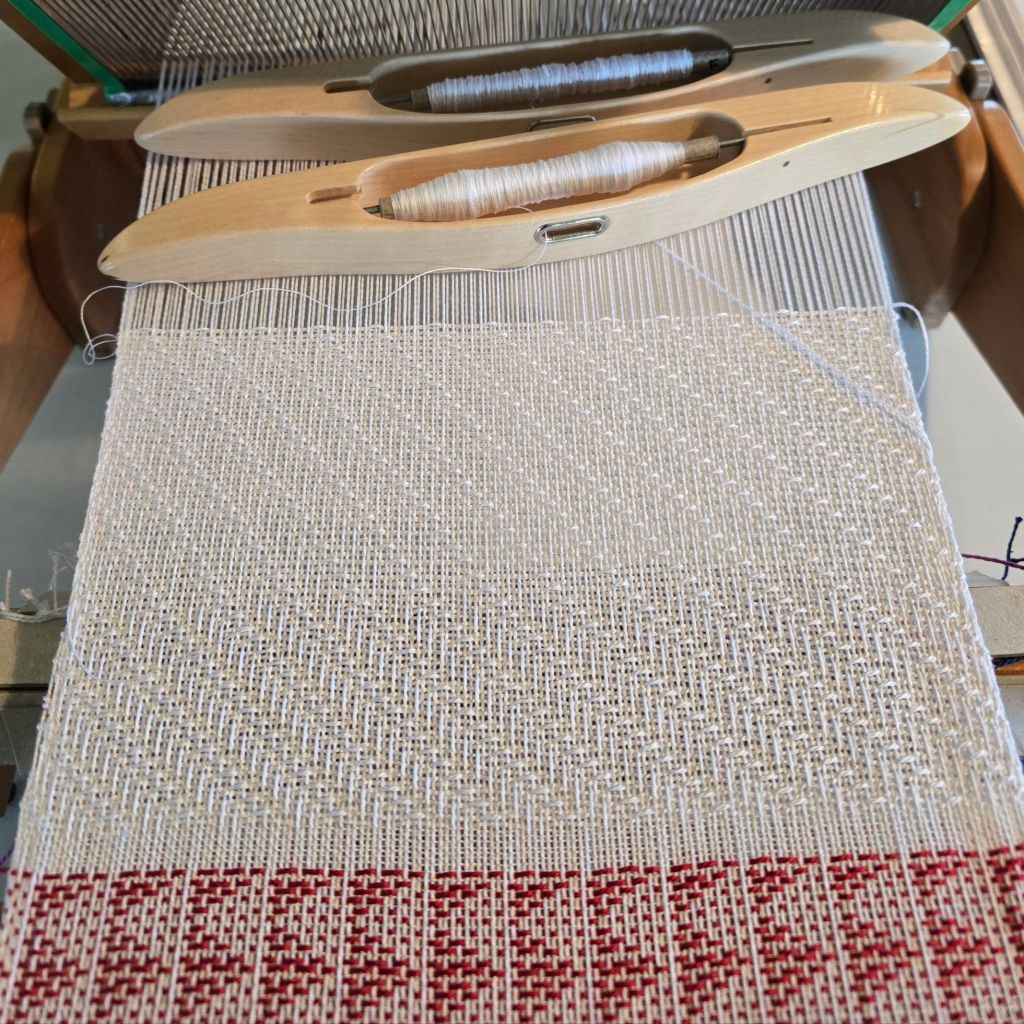
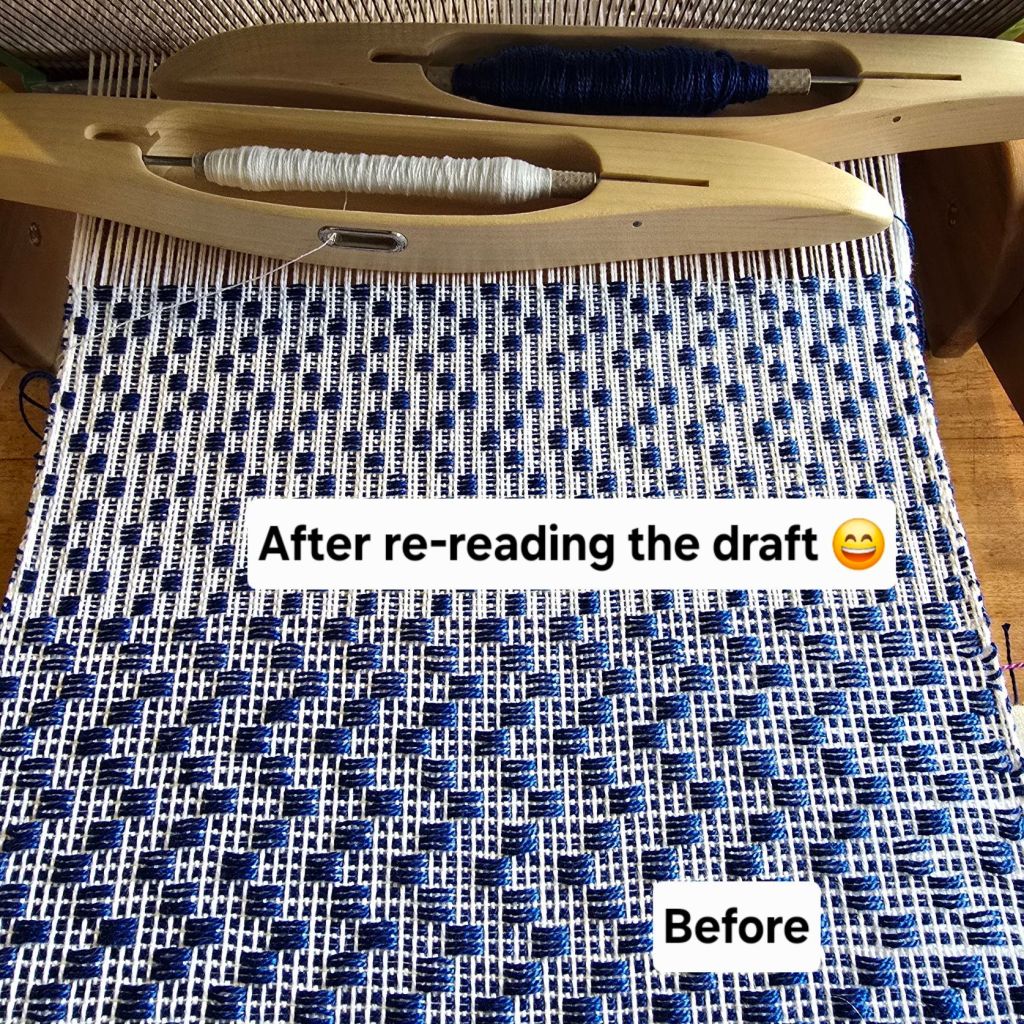
I’m weaving double two-tie samples, working my way through some of the drafts in Heddlecraft vol 4 issue 4. The warp is on an Ashford Katie loom that I bought secondhand a few months ago. It’s such an easy loom to take to weaving group meetings, compact when folded up and easy to carry in its bag, no more folding down the back seat of the car to fit my loom in.
Even though I am just following a draft, I have managed to make silly mistakes twice so far. Does anyone else keep weaving even though the sample does not look like the photo by convincing yourself that somehow it will look alright once it’s washed? It wasn’t until I left my weaving and then came back and reread the draft that I realised my mistake.
Fingers crossed I have learnt my lesson and will pay more attention in the future.
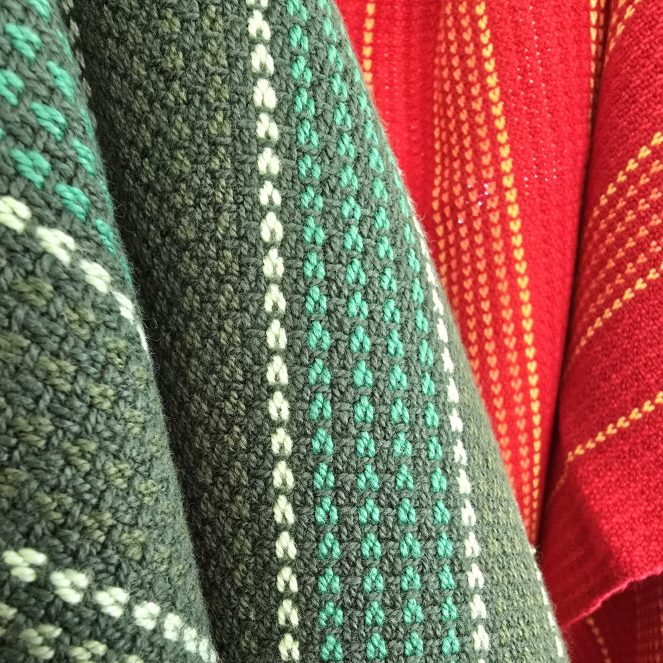
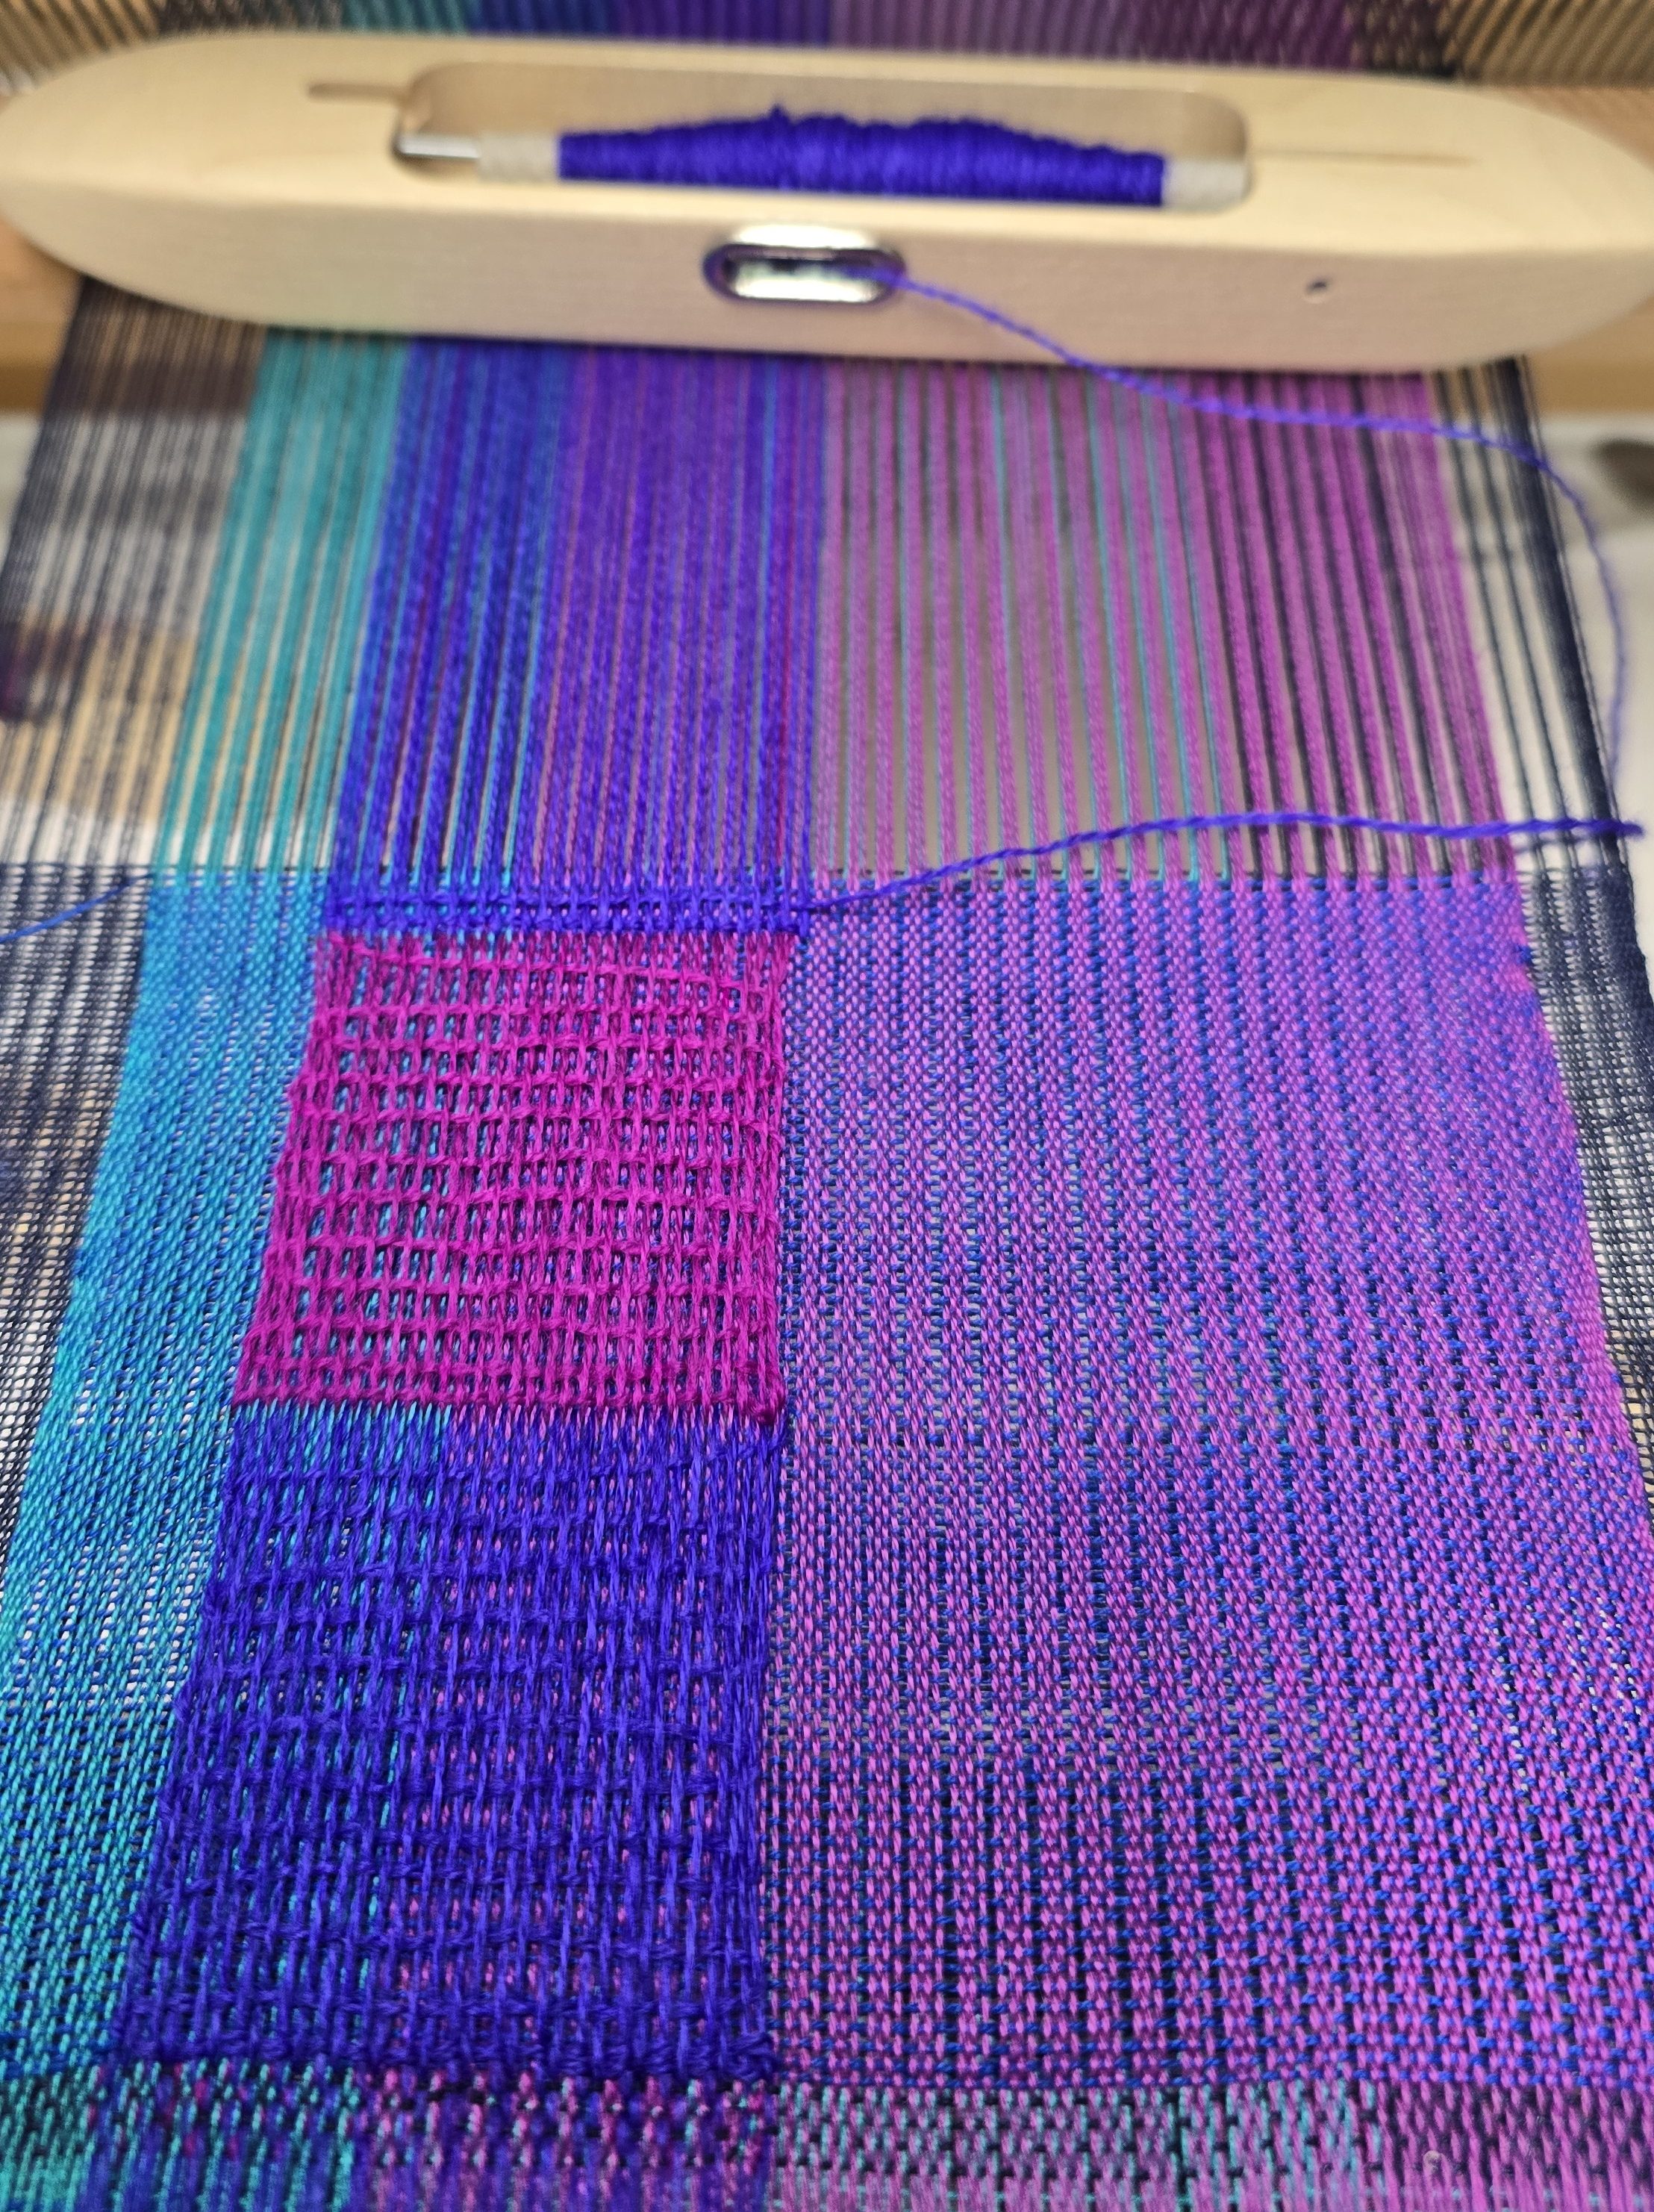
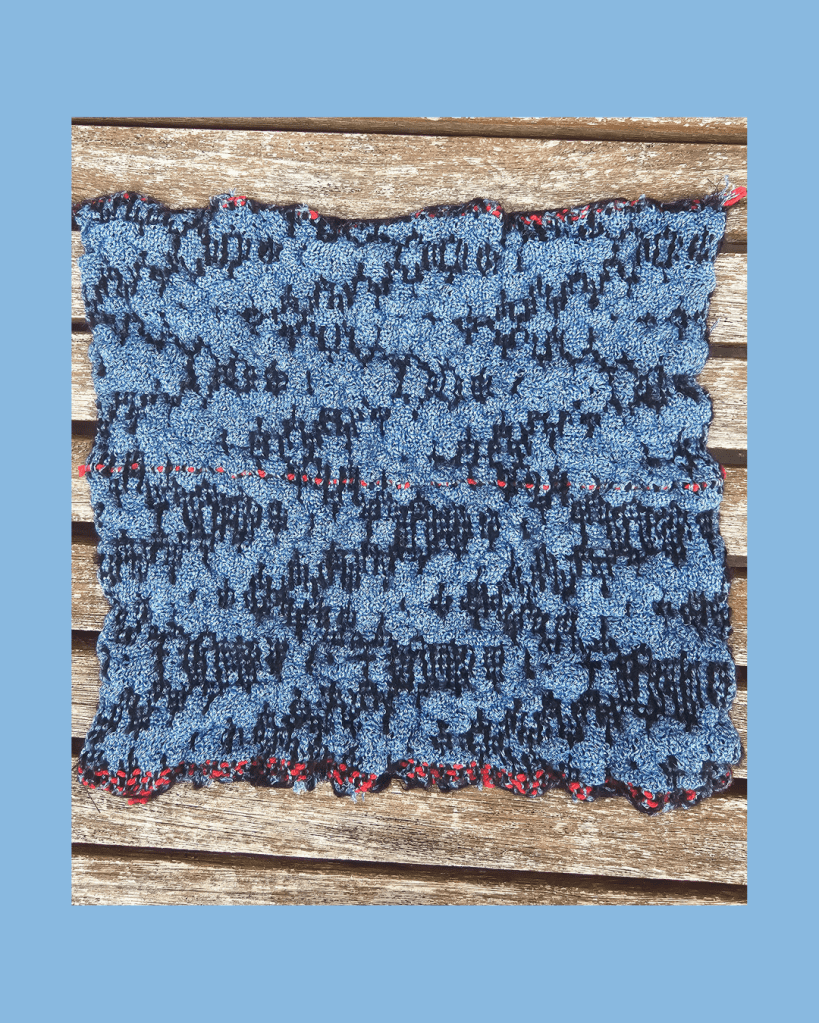
Some photos of samples I’ve been working on, I’m part of the Complex Weavers Dimensional Texture study group and our topic of study this year is Layer Interchange.
My first warp was 2 layers 10/2 cotton and 2 layers of R110/2 Tex corriedale. The wool layers are the only layers that interchange. The weft yarns were the same as the warp, and I also tried the cotton as a weft yarn on the wool layers to reduce the weft-wise shrinkage of those layers.I washed the samples in hot soapy water with agitation to cause shrinkage in the wool layers. After finishing the first sample I removed some warp threads from the left hand side, effectively moving the wool warp threads off centre
I wound a second warp using 20/2 cotton instead of 10/2.
Now I just need to decide on the final design and weave my samples to send to the other members of the study group.
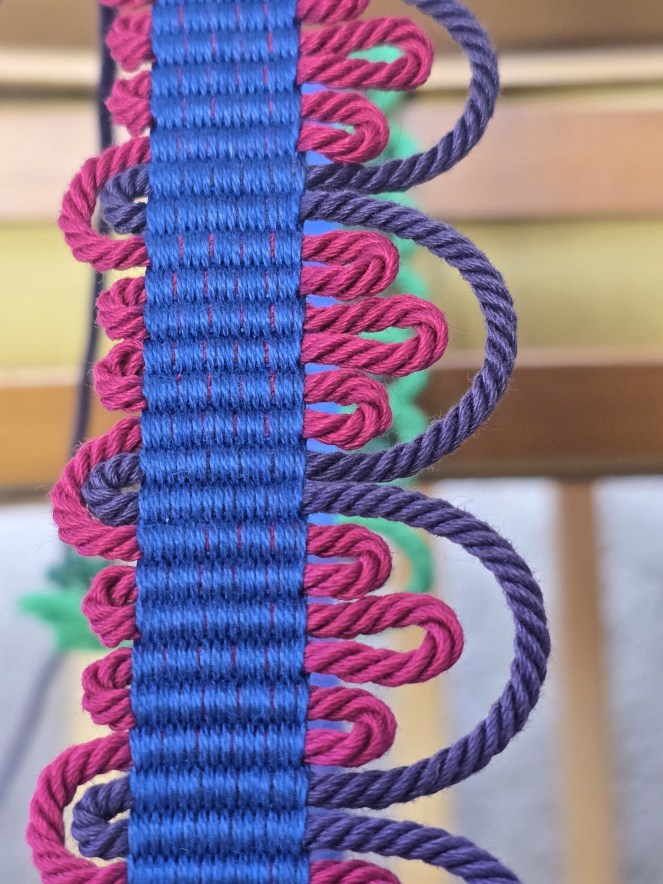
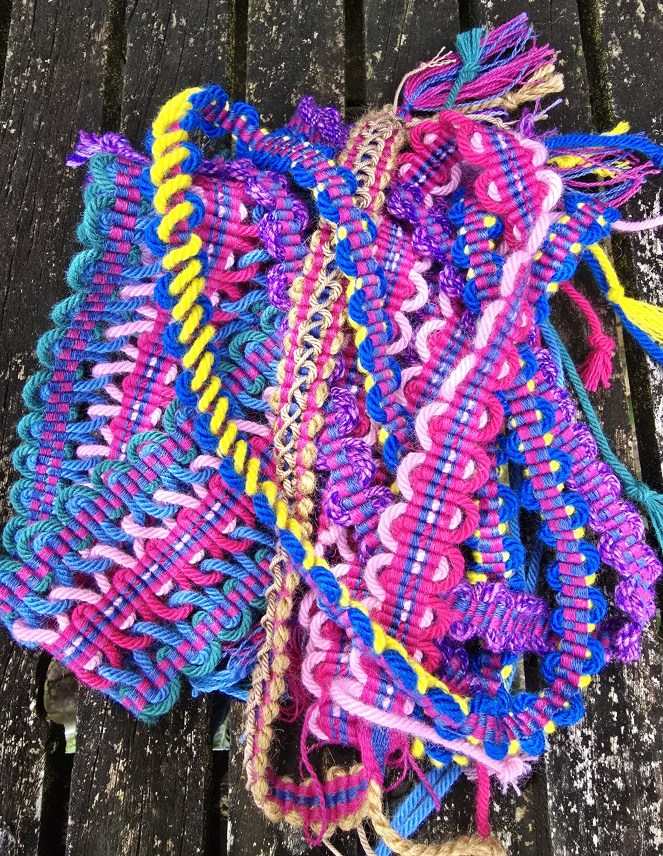
I’ve been exploring weaving passementerie as it is the set topic for the group I’m in as part of Cross Country Weavers, a Creative Fibre group. The first step was creating some cords, mostly using 20/2 cottons.
Then it was on to the weaving, some of the braids I wove on my table loom and some on my floor loom. It was a lot of fun trying out different designs
Resources:
Passementerie by Elizabeth Ashdown
Handwoven Decorative Trim – An introduction to weaving passementerie trim by Robyn Spady
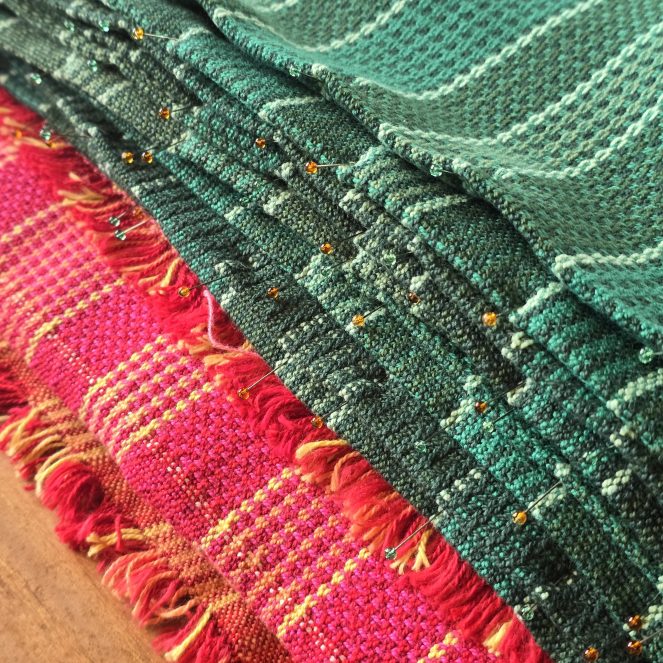
Last month I attended a weaving workshop covering double weave, deflected double weave and differential shrinkage techniques. It was held as the part of the Auckland Creative Fibre Spring Education Festival and led by Agnes Hauptli. There were 10 of us and prior to the workshop we were supplied with pre-wound warps to dress our looms, a different one for each student. The workshop was run as a round-robin so that at the end of the workshop we all had a variety of samples to take home, as well as the remainder of the warp on our own looms to weave off. The samples were all wet finished and here are the results.
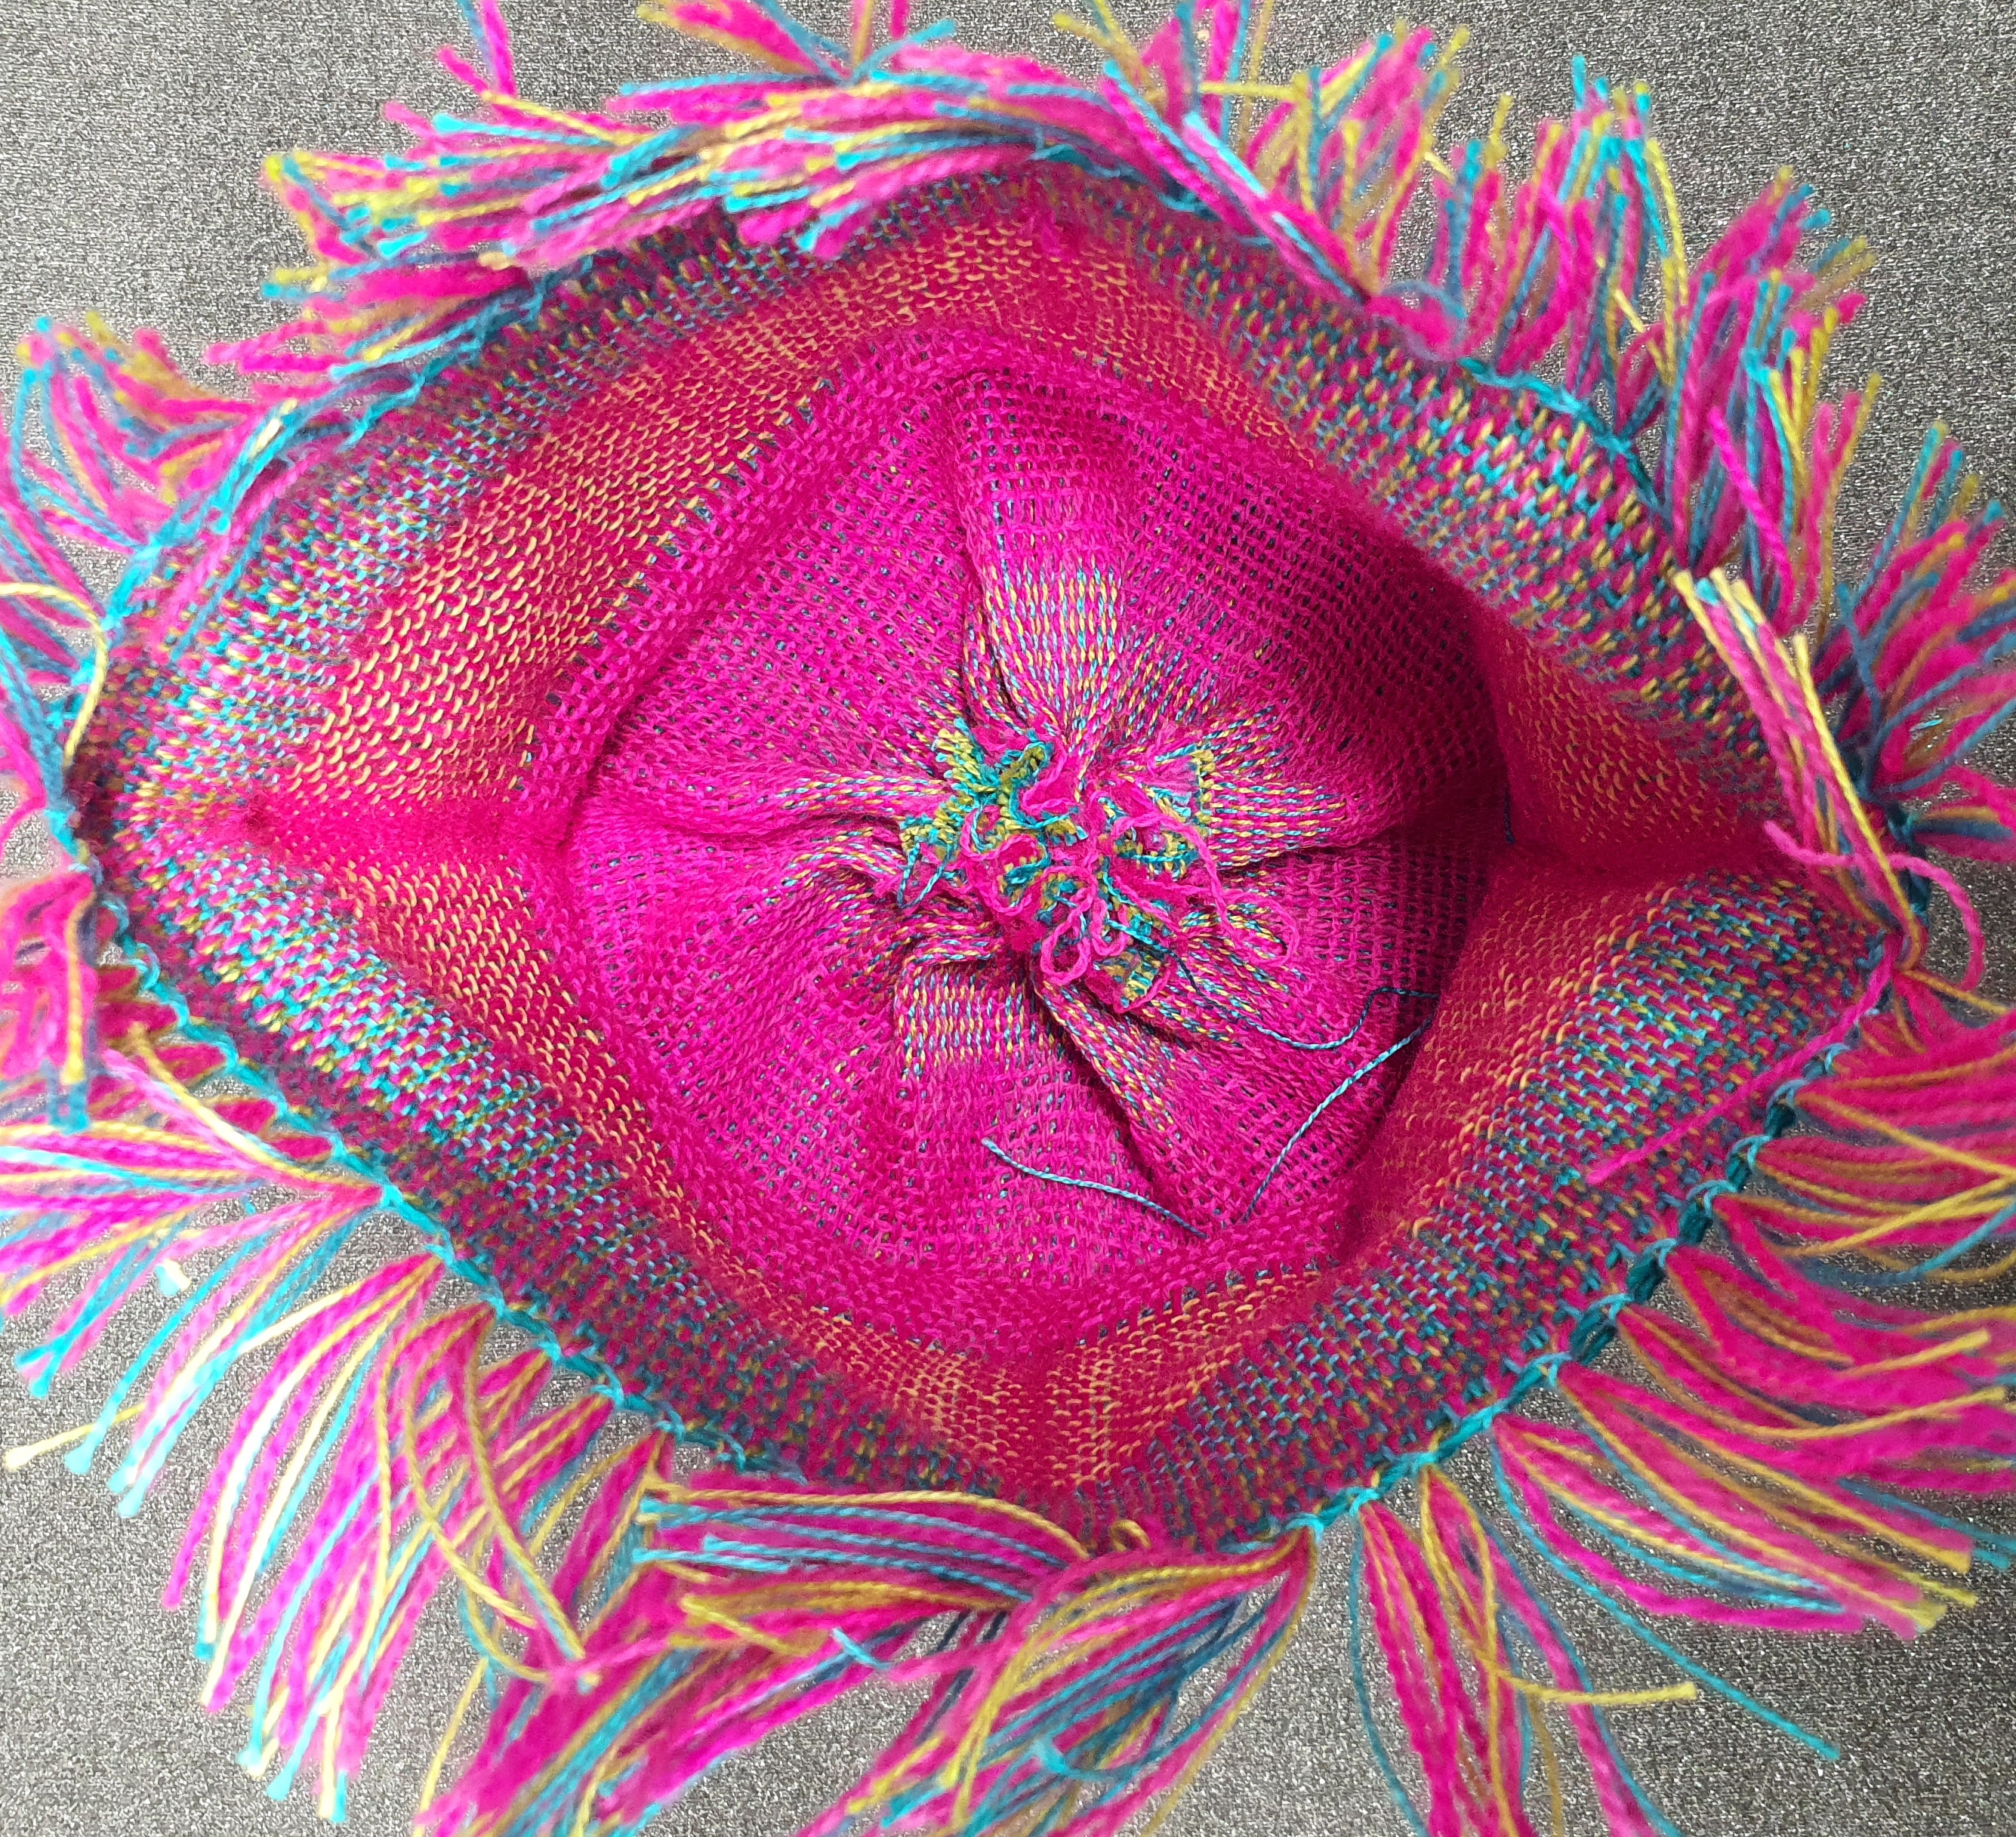
Back in February I wove a bunch of doubleweave vessels based on the instructions from VAV magazine Nr. 3 2023. I was using corriedale yarn from Anna Gratton instead of the yarn used in the magazine so had to experiment a bit to get the results I wanted. The basic method is to weave a tube, using different yarns and weave structures (plain weave and extended plain weave), which will give you the variations in the diameter of the vessel. Once off the loom you then gather the bottom up to make a base, tidy up the edges however you like and give it a hot wash in the washing machine until it’s felted to your liking. Once you remove it from the washing machine, you have to shape your rather sad looking tube and then leave it to dry.
Off the loomTube gathered at the bottomOut of the washing machine
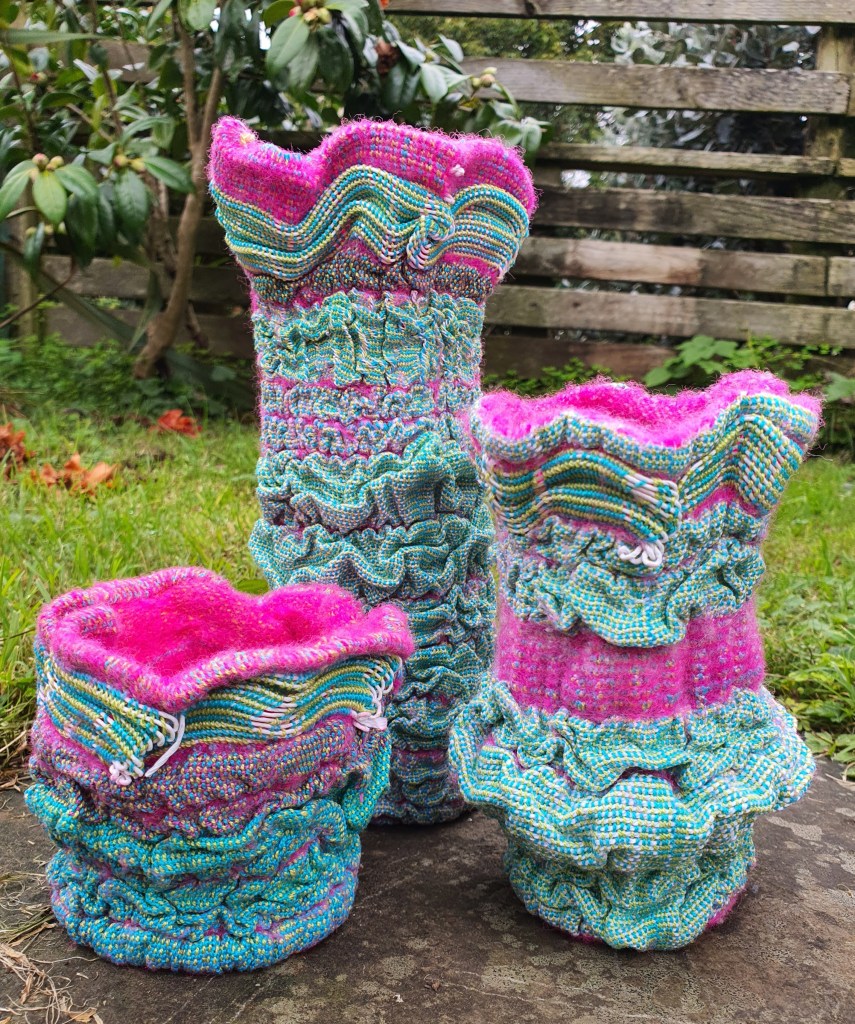
So when I put on my first warp to further explore what I had been doing at the workshop with Stacey Harvey-Brown I decided to try make some more vessels but this time using 4 warp layers to weave a double layer tube, with the inner tube having a wool warp and the outer tube a cotton warp. The wefts were a mixture of cotton, paper, and wool. Once off the loom I gathered the bottom of the tube and then wet finished it by hand in hot soapy water until I was happy with the results. The shapes and textures of the vessels are caused by the differential shrinkage between the inner and outer tubes, different weft yarns and when and how the inner and outer layers are connected,. I particularly liked the effect the paper yarn produced when used in the weft, you can see that in the upper edges of the vessels.
Exterior of tube before wet finishing The tube turned inside out to show the inner layerThe interior of the vessel before wet finishing
Time to dust this poor, neglected blog off and post some new photos. There’s been a bit happening but the most exciting is our trip to France and London in June. I mentioned in a post way back in September last year that I had been awarded the Creative Fibre Mason Charitable Trust scholarship for 2023, and that I was putting the funds towards a weaving workshop with Stacey Harvey-Brown. The beginning of June saw me and my husband flying to Paris where we spent a fabulous few days sightseeing before heading to the Loom Room France located in the beautiful SW French countryside near Nérac.
Just one of many photos of the Eiffel Tower from our trip.
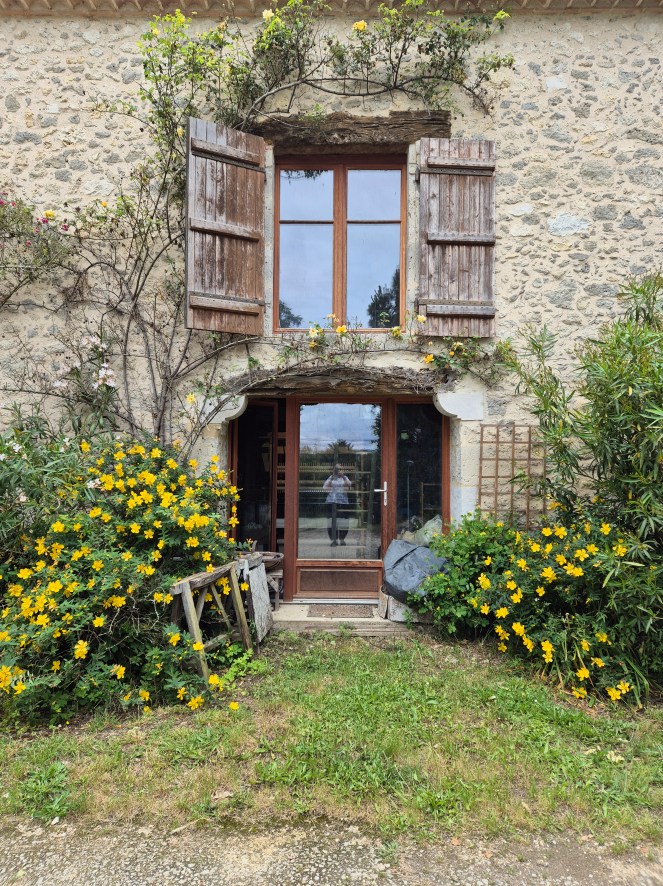
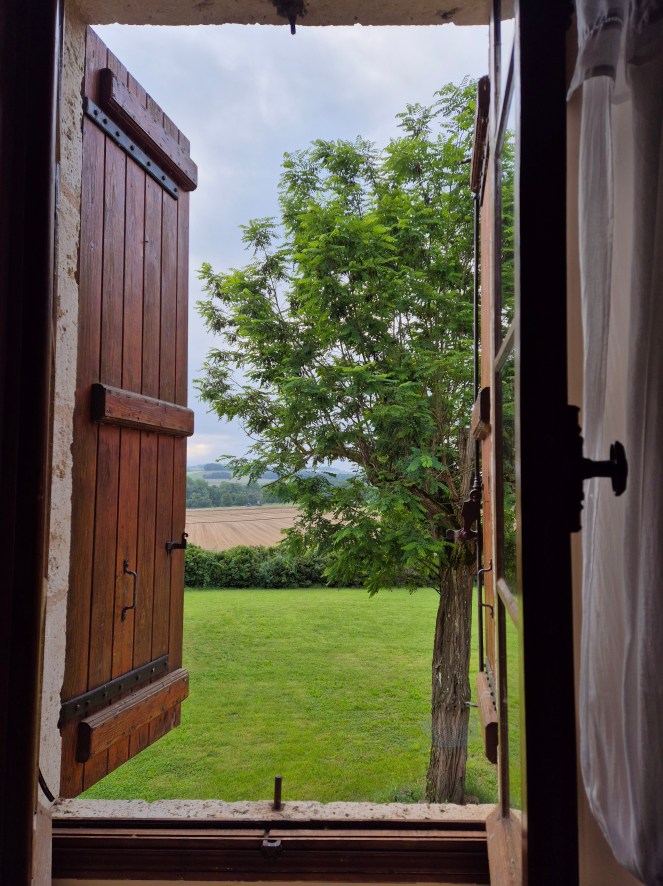
The Loom Room is a purpose-built studio integrated into a renovated barn, attached to La Tuilerie, a ‘maison de maitre’ which is Stacey and her husband Graham’s house and where we stayed. There were 2 other weaving students staying for the week and we were each had our own weaving programme tailored to what we wanted to learn. While I was off weaving, Dale explored the neighbouring countryside on foot and just generally relaxed.
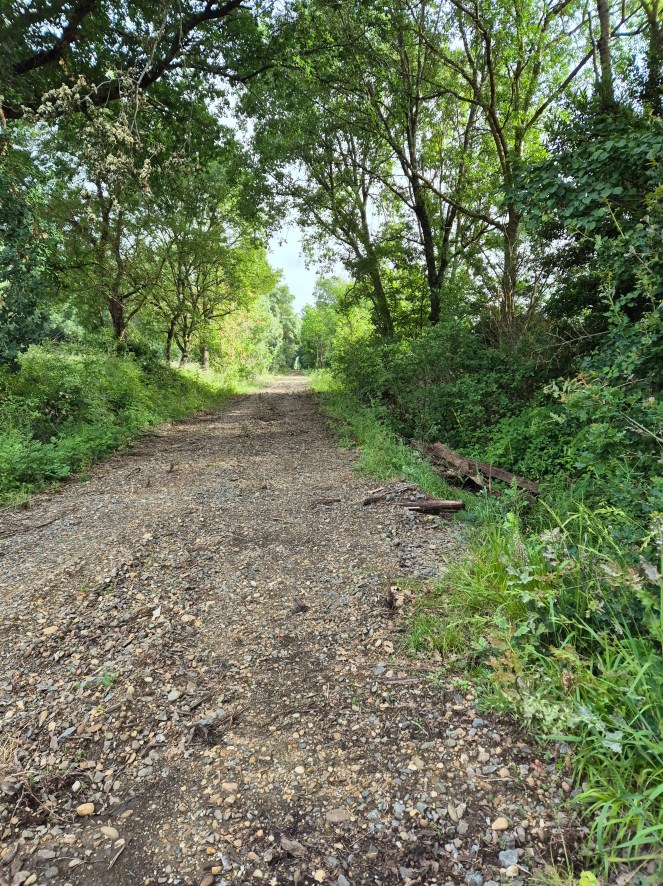
Outside La TuilerieThe view from our bedroom windowLooking outside from the studioThe garden gate leading to the path in the next photoThe start of morning walks, exploring the country side
We were all staying on site, which meant we shared meals together. Graham cooked us delicious lunches and dinners, and Stacey went into town each morning to get fresh bread and pastries for our breakfast. We also were treated to local wines with our meals and Graham’s own beer from his micro-brewery. When we weren’t weaving Stacey showed us around the neighbouring area including a woad-dyeing business, the Saturday market at Nérac, a couple of bastides (fortified towns), some amazing churches, local artists and several meals out.
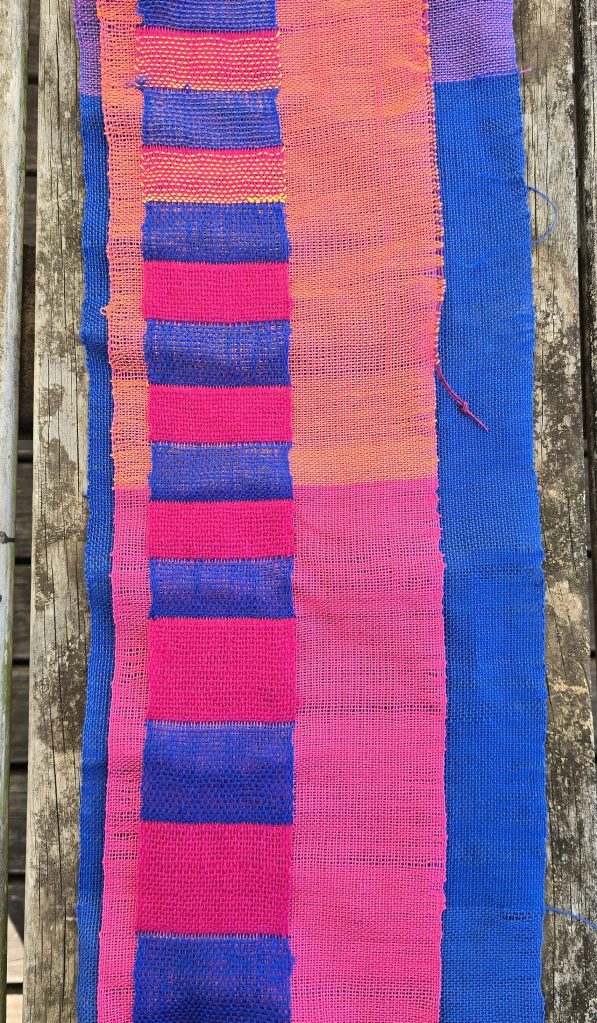
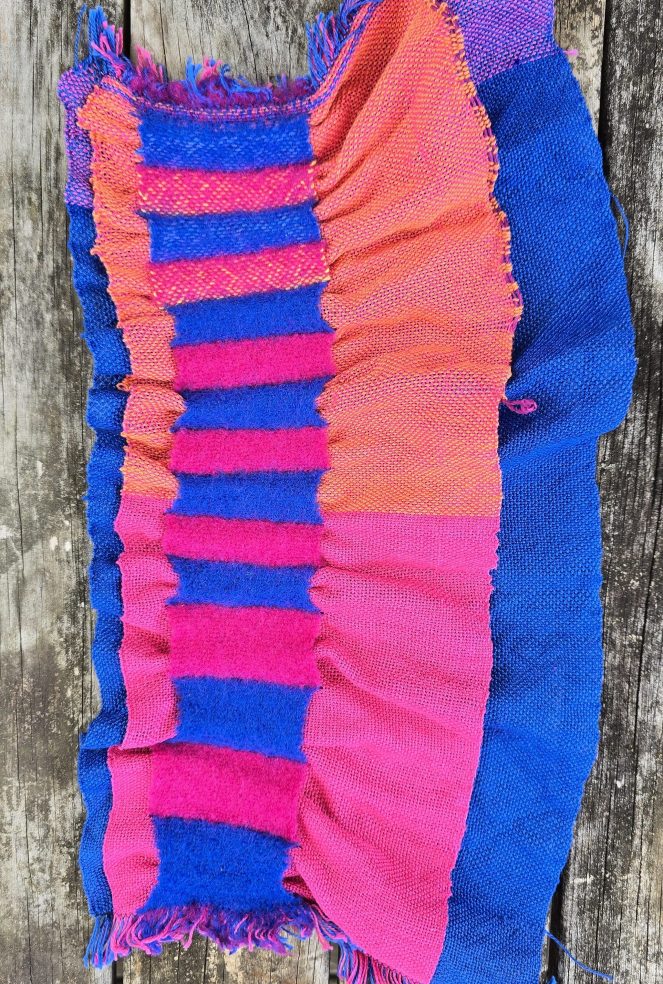
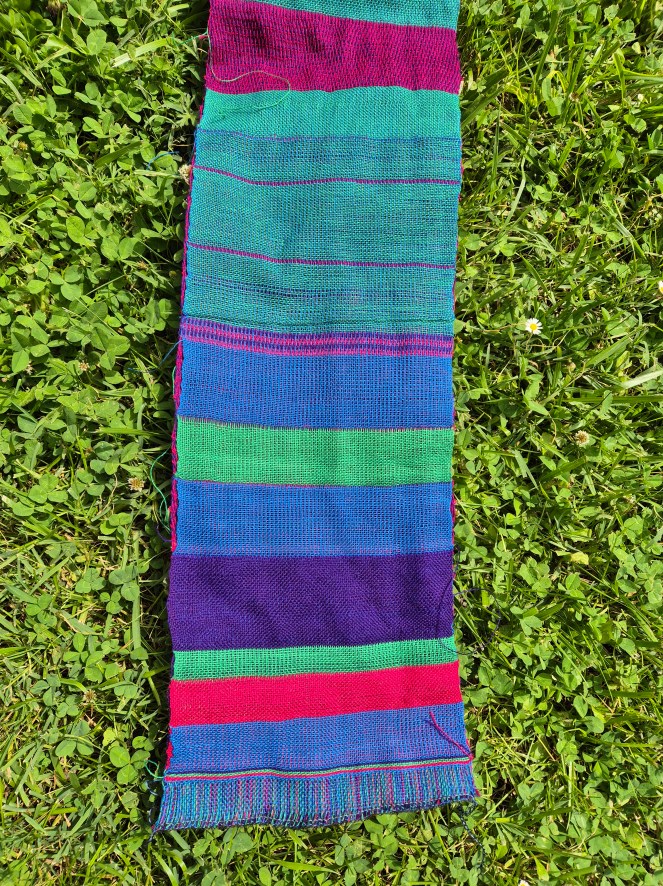
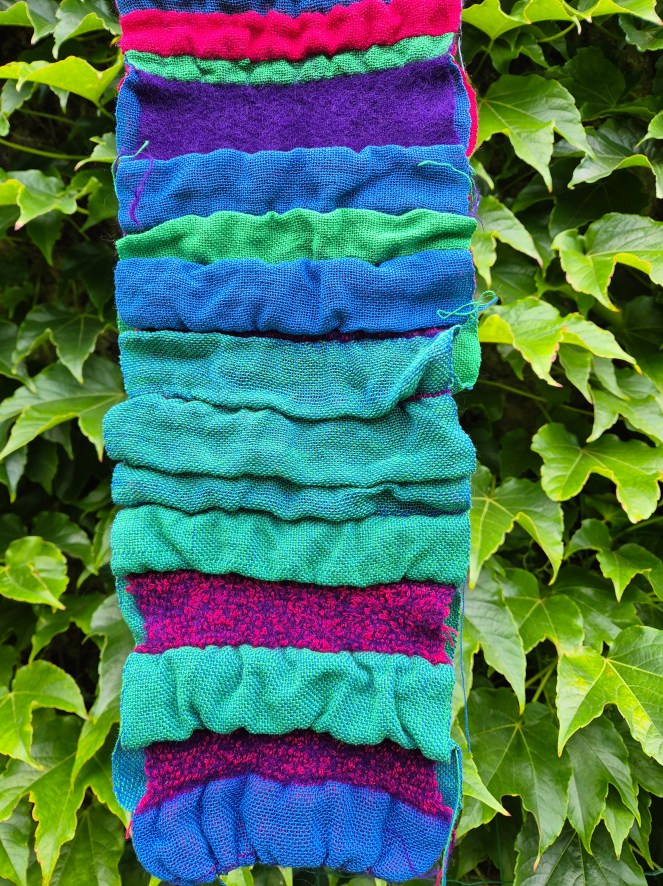
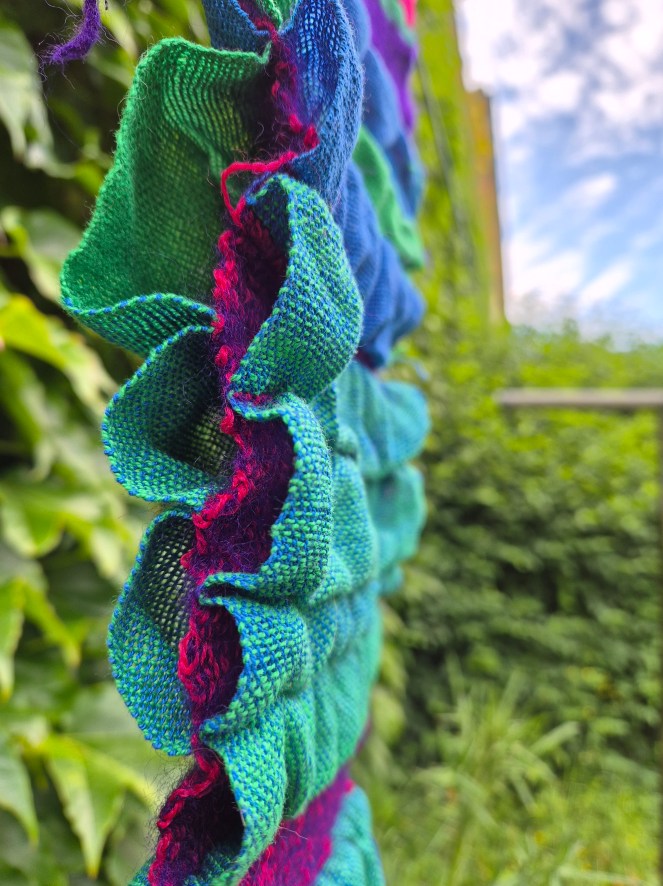
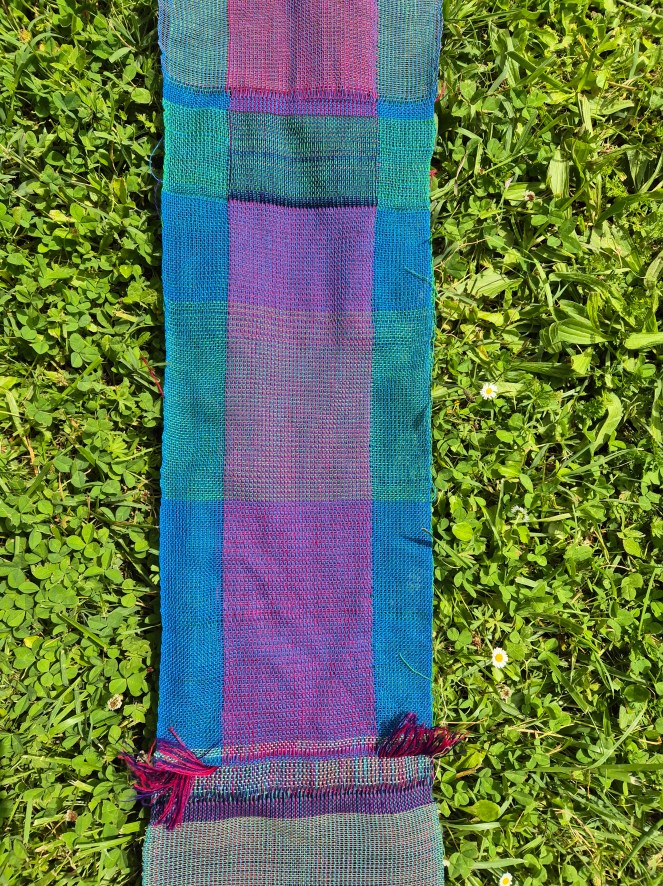
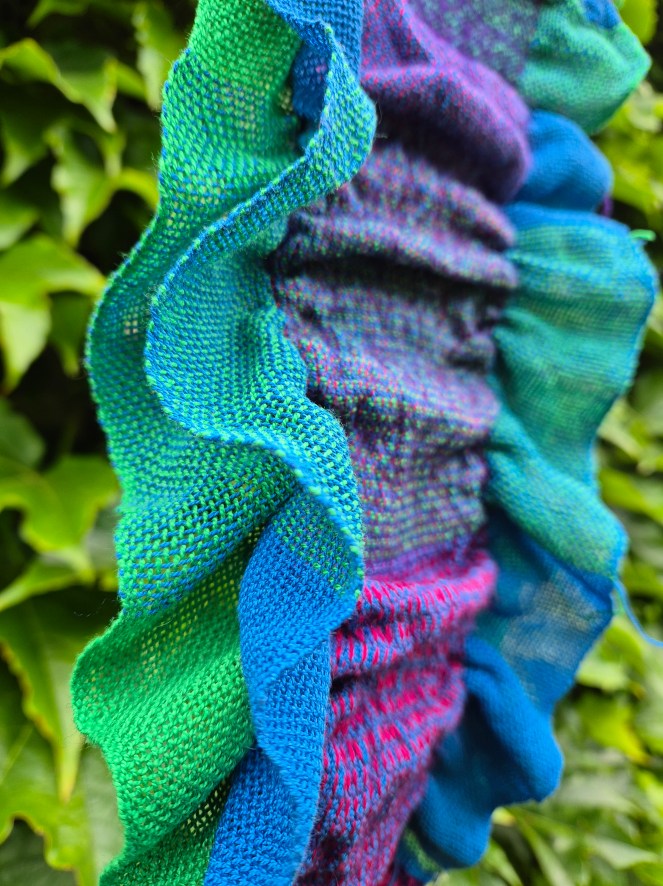
But back to the weaving, I was interested in learning about sculptural weaving so Stacey had a 8-shaft table loom ready for me warped up with 4 layers, 2 cotton and 2 wool. My samples didn’t look too exciting on the loom as they were flat plain weave layers. I explored swapping layers, weaving tubes, using different yarns including paper and linen and lastly removing some of the edge warp threads from the woollen layers. The magic all happened on our last weaving day when I took the samples off the loom and wet finished them, with all sorts of ruffling, gathering and shrinking going on. We also discovered during finishing one of the wool layers was probably machine-washable as it didn’t shrink as expected but that just added even more interest to the results . It was so exciting seeing my transformed samples.
Off the LoomBefore Wet FinishingAfter Wet FinishingBefore FinishingAfter FinishingAfter FinishingBefore FinishingAfter FinishingDrying on the line
I had such an amazing time at this workshop, Stacey is such an enthusiastic and inspiring teacher. Since returning home I have been continuing to explore the techniques that I learnt and having fun seeing what I can create.
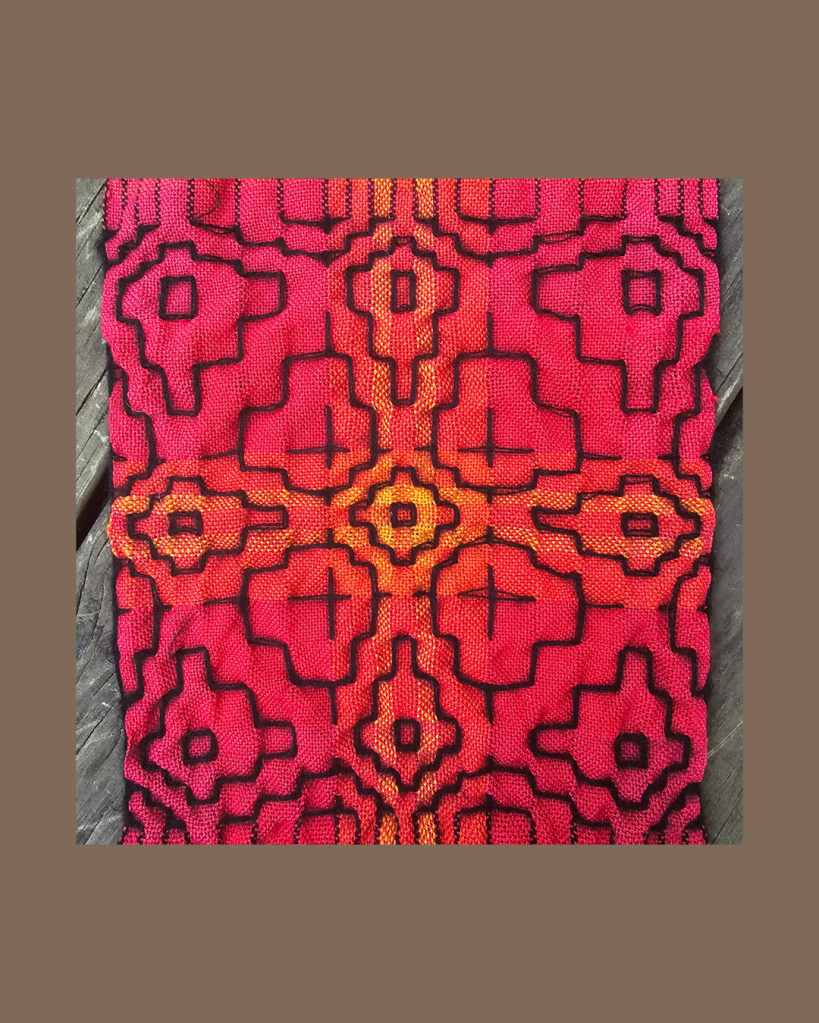
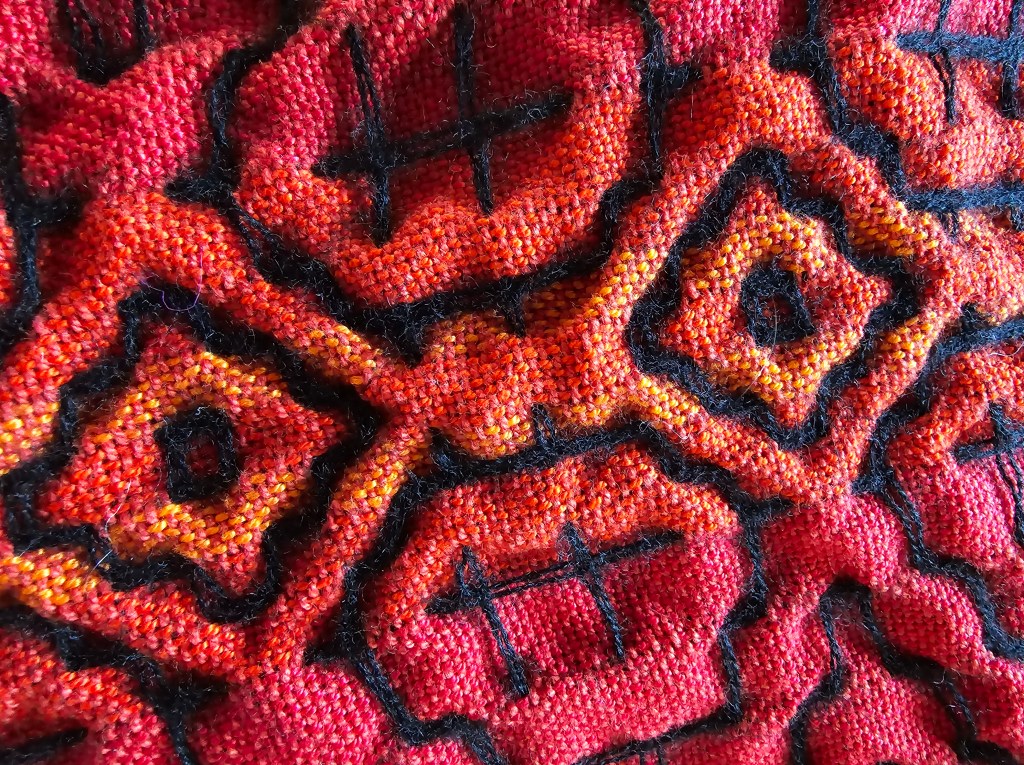
March is the start of feijoa season, and also time for Easter eggs.
On my table loom I have been weaving a colour with double weave sampler from an article in an old Weavers’ magazine. On my floor loom I have been weaving some pieces using upholstery weave from The Weaving Book by Helene Bress. The piece under the Easter egg basket above, and in the middle photo below used 3 weft colours, and the piece on the right used 4 weft colours.
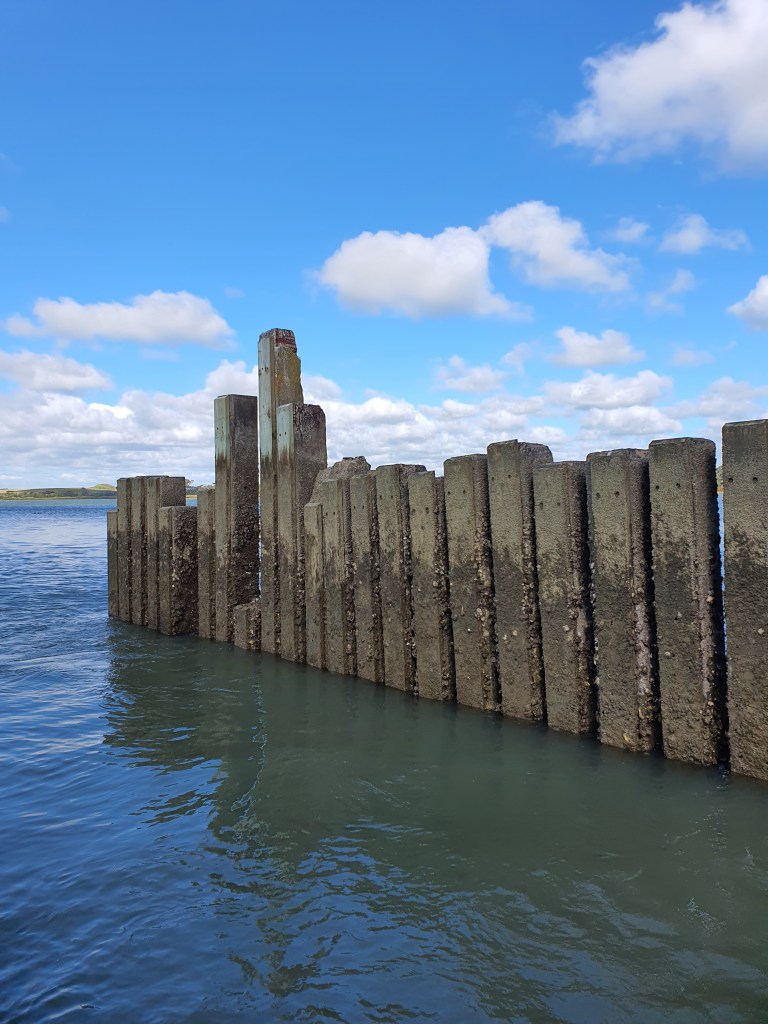
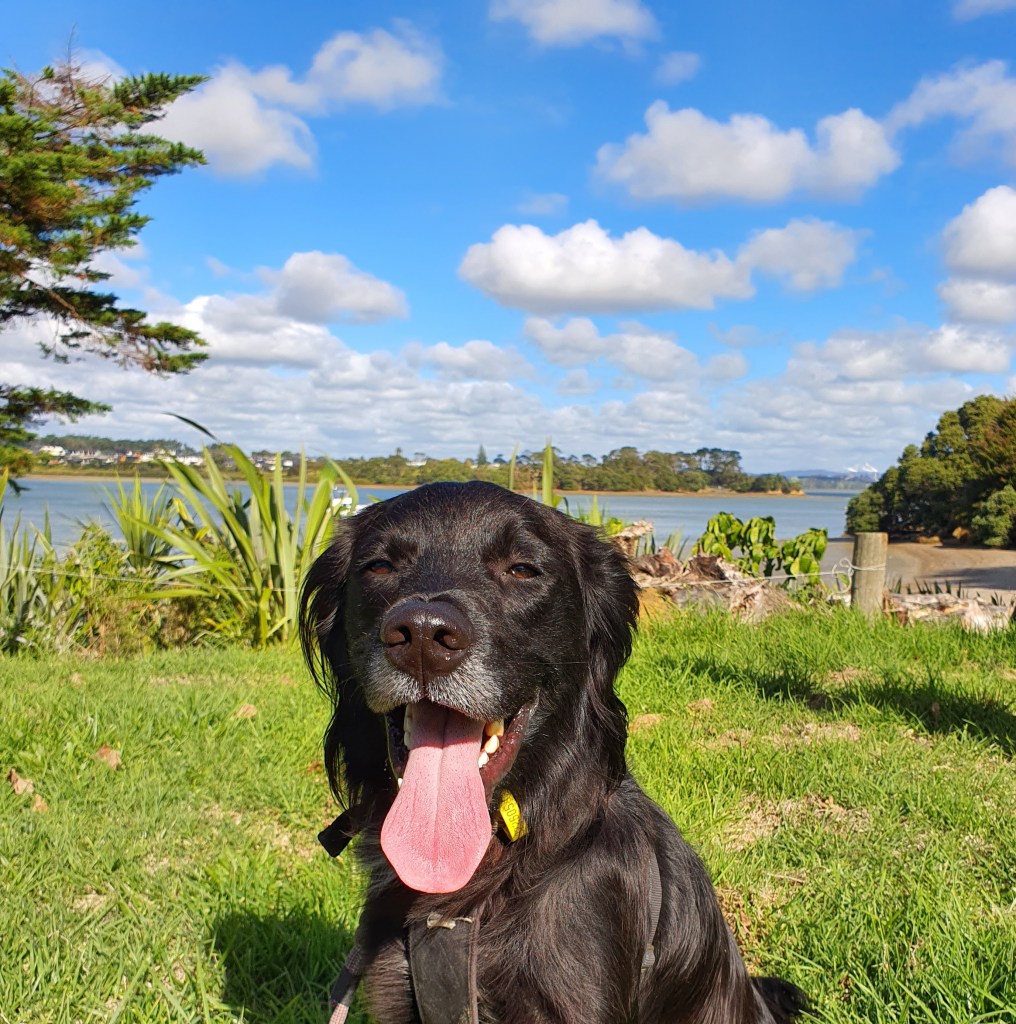
Rufus enjoyed a trip to Te Toro beach, with many things to sniff, though he was rather disappointed that he wasn’t allowed to fully investigate the dead gull he found.
And today, I finally got around to cutting the kōrari (flower stalks) from the harakeke (NZ flax) plants in the garden and harvested the seedpods for a dyebath. The first photo below show the flowers and seedpods last month, the birds love feasting on the flowers. Once the flowers have died off the seedpods fully develop and usually I harvest them when they are still fresh but I left it later this year so most of the seedpods have dried off and split open to distribute their seed.